Plan your Actions

Planning when an action should be done allows you to get it out of your head until that time arrives. This section will show you how to add due dates, schedule one-time or recurring tasks, as well as create projects and checklists.


Add a due date

Decide between a due or scheduled date

Ask yourself 2 questions:

  • Does the task needs to be completed by a certain date? Add a due date.
  • Do you intend to do the action on a certain day, but it’s not crucial? You should probably schedule it instead.

What’s the difference?

  • Actions with a due date stay in in their original list (unless they’re also given a scheduled date). When the due date arrives, they get a Focus star, and will continue to show their due date until completed.
  • Scheduled actions stay in the Scheduled list until the date arrives, then move to the Next list and get a Focus star. At this point, the date disappears and the action will remain in the focus list until done.

Adding a due date works similarly to adding other tags and attributes. Take a look at how to add tags and attributes, including the due date.
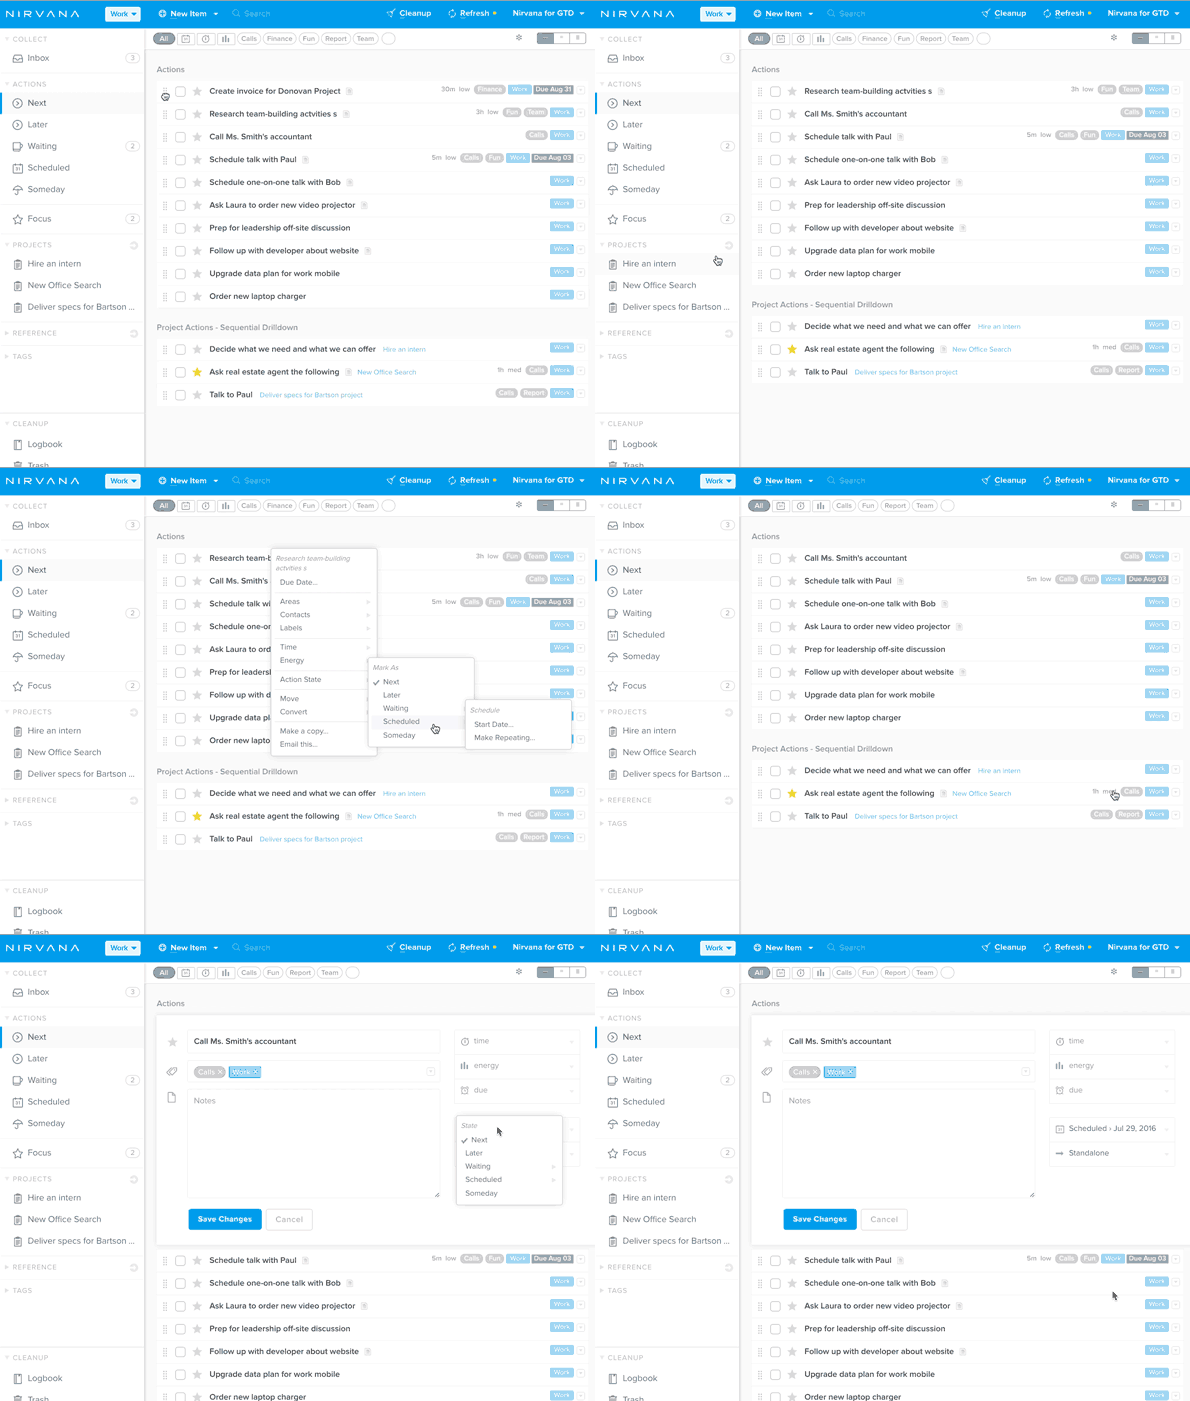
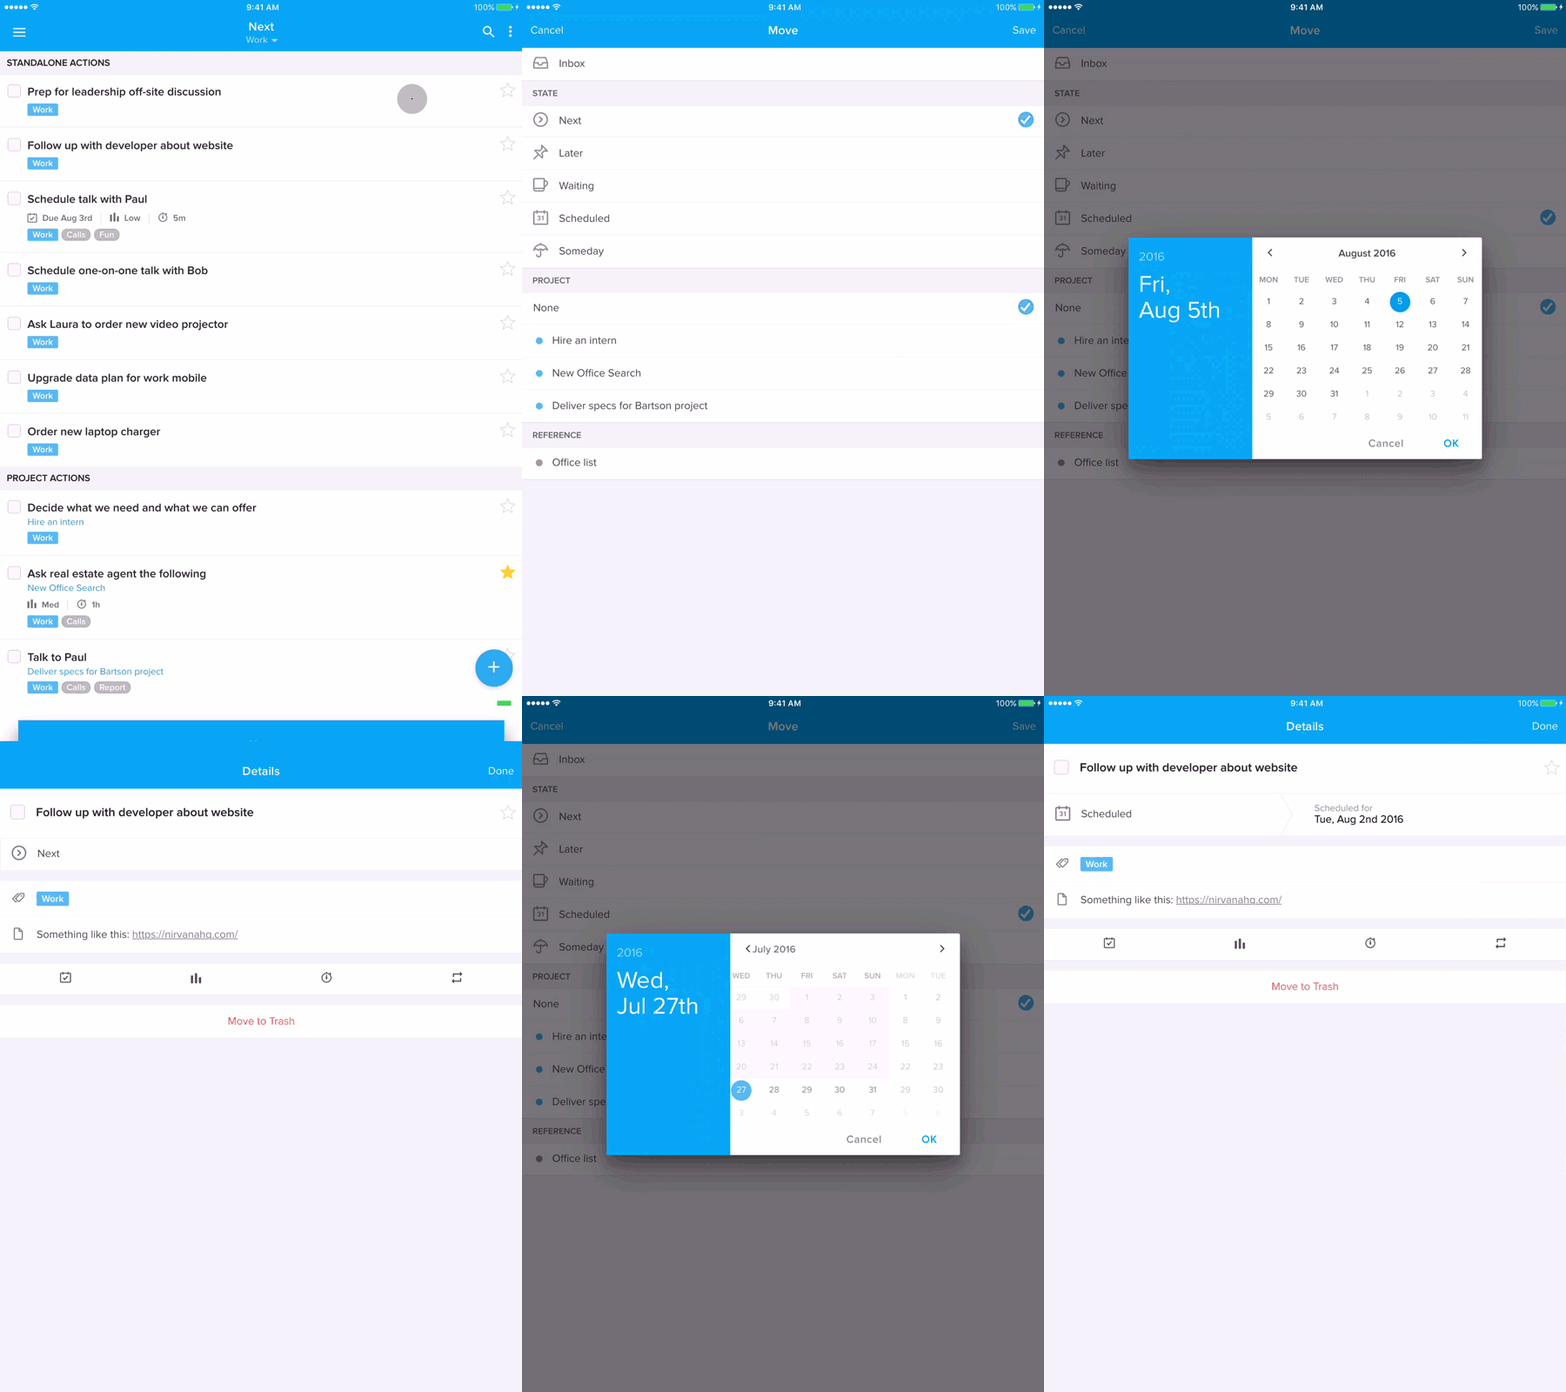
Schedule actions

You can set a deferred start date for your actions or projects by scheduling your items. When the start date arrives, they’ll move to the Next list and get a Focus star.

Schedule items for today

Since scheduling is meant for items you intend to do in the future, you can’t technically schedule an item for today. However, you can achieve the same effect by starring the action.

If you’d like to have a date attached to your action, you can give it a due date of today. This will give the item the Focus star as above, but will also add the label Due Today (which will change if it becomes past due).

Schedule recurring tasks

The ability to create recurring tasks is one of the perks of being a Nirvana Pro user. You can easily schedule repeating actions so you’ll never forget to accomplish them. Check out the videos and take a look at the play-by-plays below for more details.

Create a recurring task

You can choose either to stop here or to create a due date for each copy.

Create copies with due dates

Pause or delete a cycle before its end date

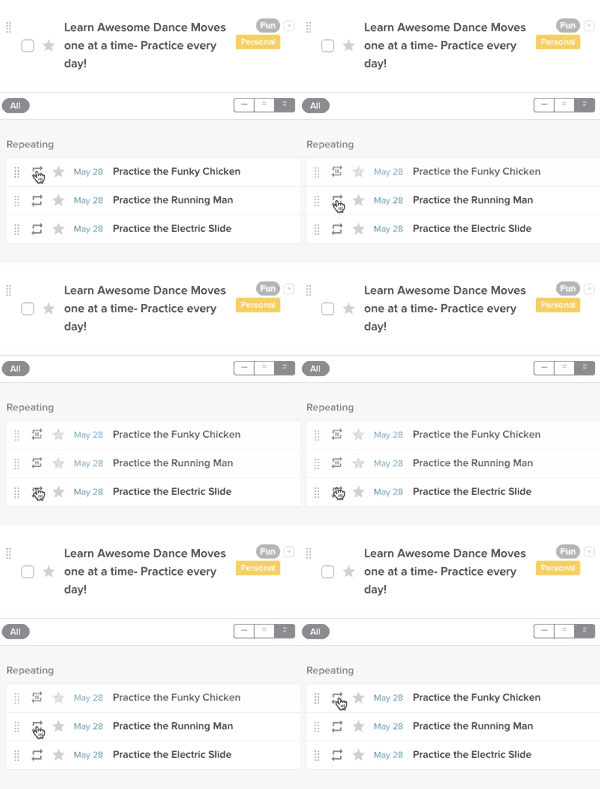
  • To temporarily pause a recurring task cycle, click the cycle icon on the far-left of the task to see the pause symbol . Click the icon again to restart the cycle.
    Pausing and restarting a recurring task cycle
  • If you want to permanently delete a recurring task cycle before its end date, first pause it, then move it to the Trash.

Now you’re a recurring tasks expert!

Create a project

To create a project, you can:

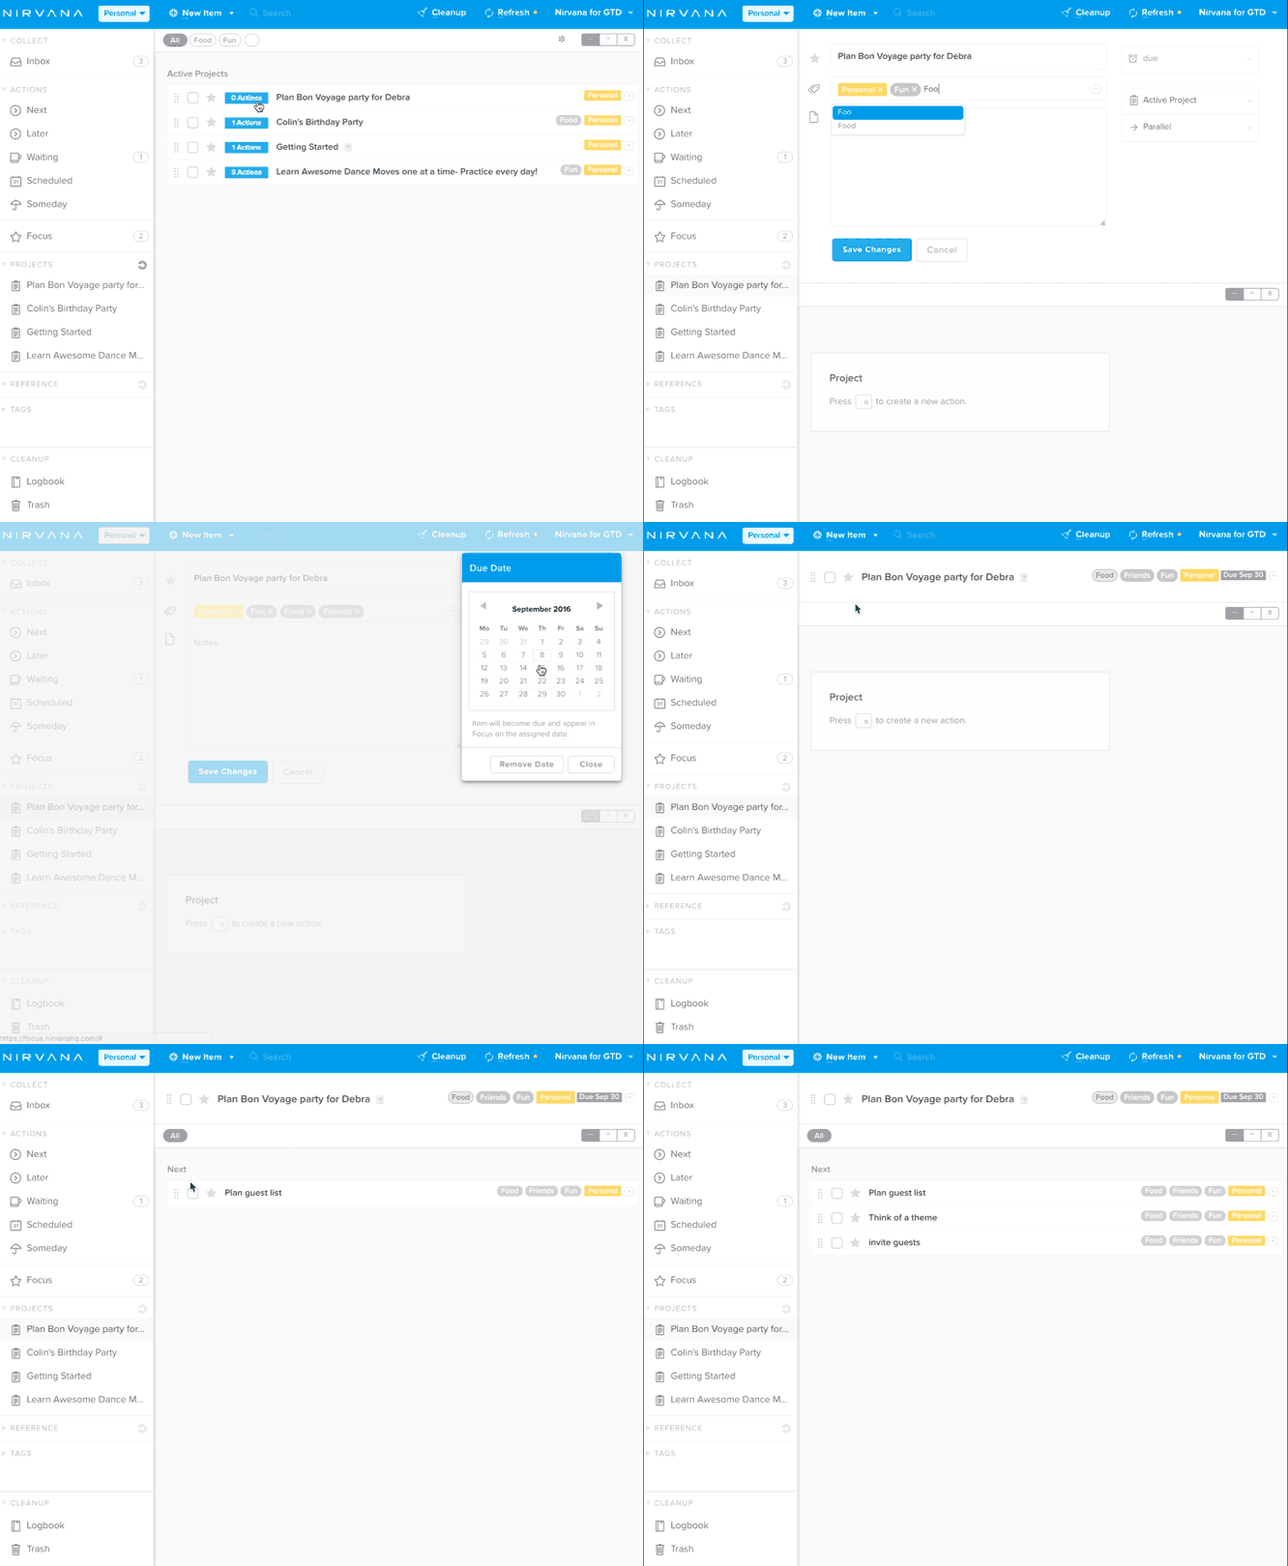
Give the project a name and choose parallel or sequential project behaviour. You can also add tags, a due date, or choose an action list for your project to live in.

Creating a project

Add items to the project

  • You can create project actions by clicking New Item or tapping the from within the project or with keyboard shortcut N .
  • You can also move tasks from an actions list or another project.

Use tags with projects

As with reference items, project actions inherit the tags of the project itself.

You can add tags to project actions individually. However, if you want to delete an inherited tag from the item, you’ll need to remove it from the project list itself.

See project actions in your Next list

The Next list contains 3 views, all of which allow you to see the next incomplete action(s) from your project. You can mark these actions complete from here or from within your projects. Here’s how to see what’s coming:

  1. Create your project and arrange your actions in the order you want them to appear.
  2. Ensure that the project and its actions are active. This will happen if they are Next or if the scheduled date arrives. In sequential projects, note that the first task must be completed for the next one to become active, and so on.
  3. Take a look at the Next list and explore the views to see just what you’d like.

Create checklists in your notes

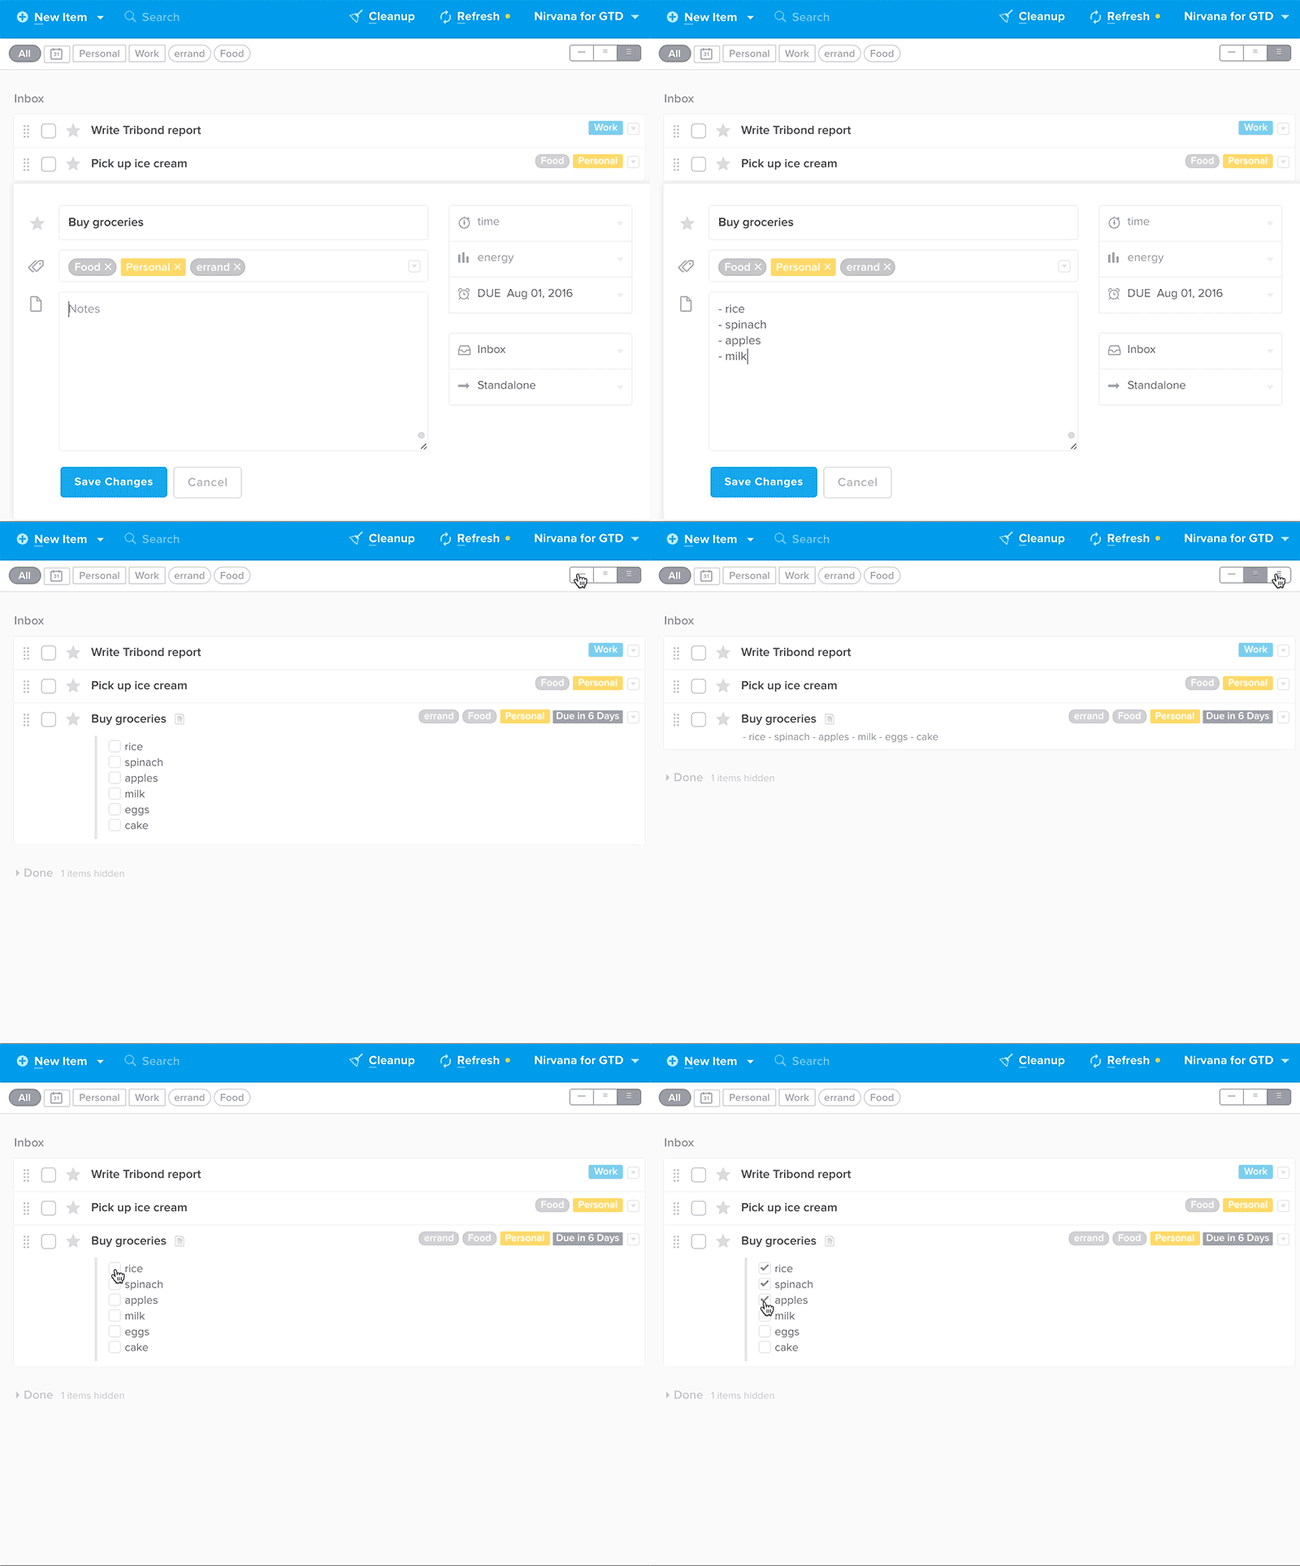
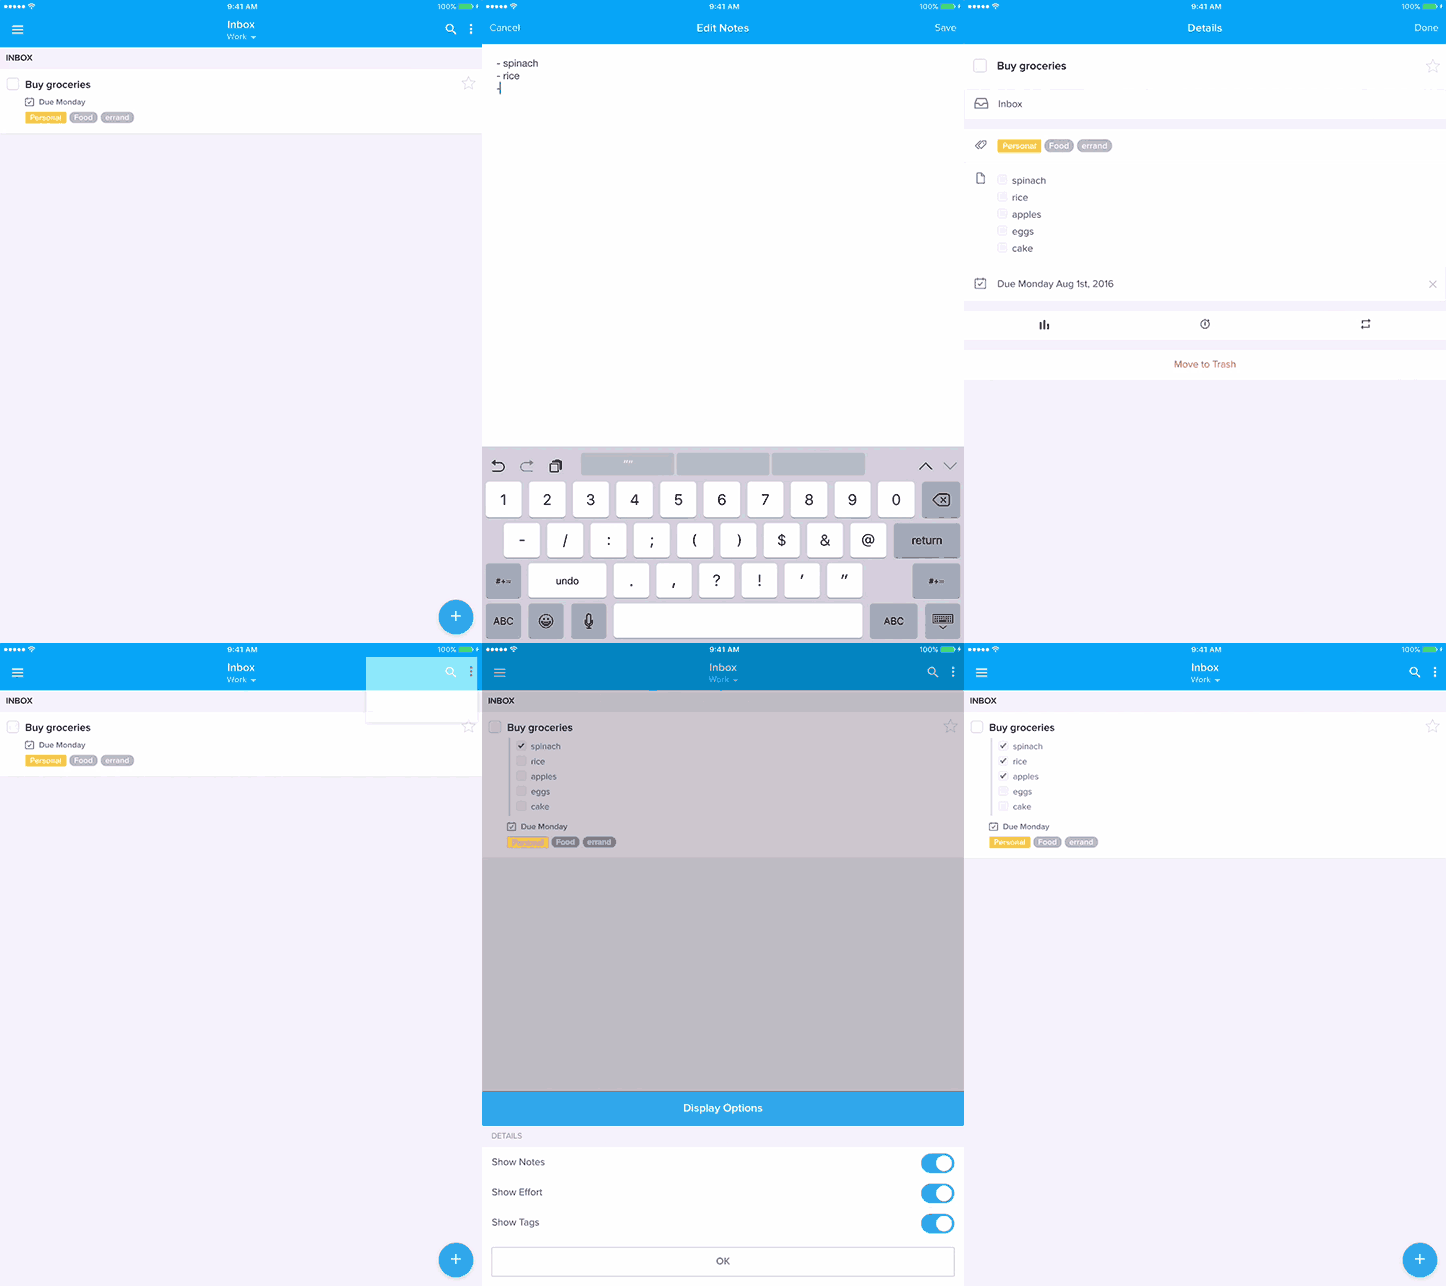
  1. Add a hyphen and a space (- ) at the beginning of each line in the notes.
  2. Save the note and, when an item is seen in a list with fully expanded notes, or when it’s tapped to show details on mobile, this note will become empty checkboxes.

If you check off an item and go back to editing your notes, you’ll see the hyphen replaced by an x. Here’s the whole process in action:

Good to know: Checklists can be made in all types of items, including reference lists and reference items. Just make sure to leave a space after your hyphens!