With Rapid Entry, you can quickly add tasks in the web app without moving your mouse.
Good to know: You can press Shift + Enter to add items to the top of the list instead of the bottom.
In addition to creating basic entries, you can also add tags and certain properties using Rapid Entry. Just follow the order below:
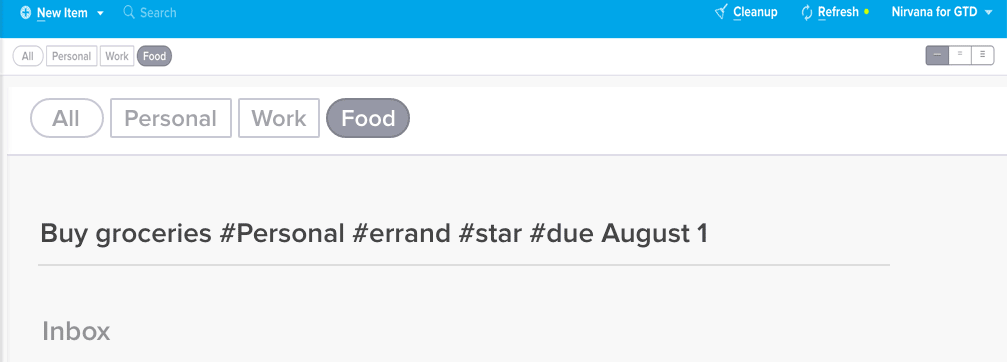
In this example, the entry “Buy groceries #Personal #errand #star #due August 1” will create the focused task “Buy groceries” with a due date of August 1st and the tags “Personal” and “errand”.
Good to know: Tags are automatically added if your current view is filtered. In the example above, the Inbox was filtered for “Food”, causing the new entry to also contain this tag.
Assigning tags and attributes to your items is a great way to clarify and organize your stuff. Here’s how to add details such as these:
Good to know: Reference items and project actions inherit the tags of the project or reference list itself. You can add tags and attributes to project actions or reference items individually. However, if you want to delete an inherited tag from the item, you’ll need to remove it from the project or reference list itself.
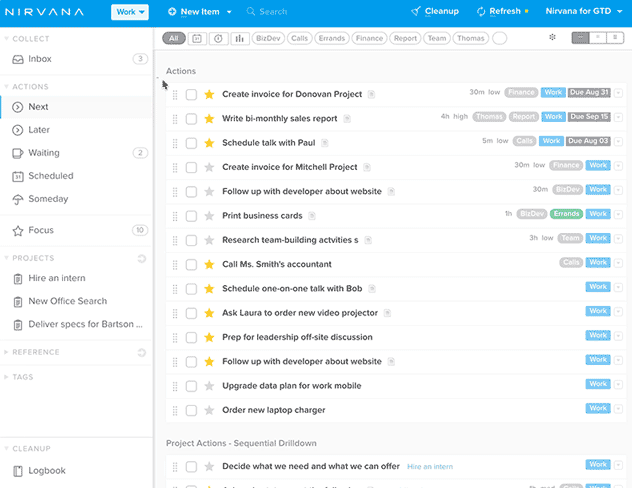
You can add, delete, and modify your tags easily in Nirvana.
Good to know: The free version allows you 2 area tags and the Pro version allows you an unlimited amount.
Contacts can be managed and added to items in the same way as other tags, but there are 2 differences:
When you assign a contact to an item as a tag, the item stays in its original list. You’re just adding the contact for organization purposes. If any action is going to take place, it’s your move.
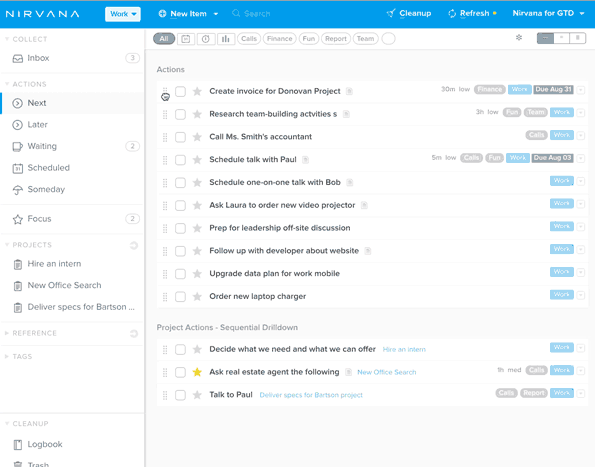
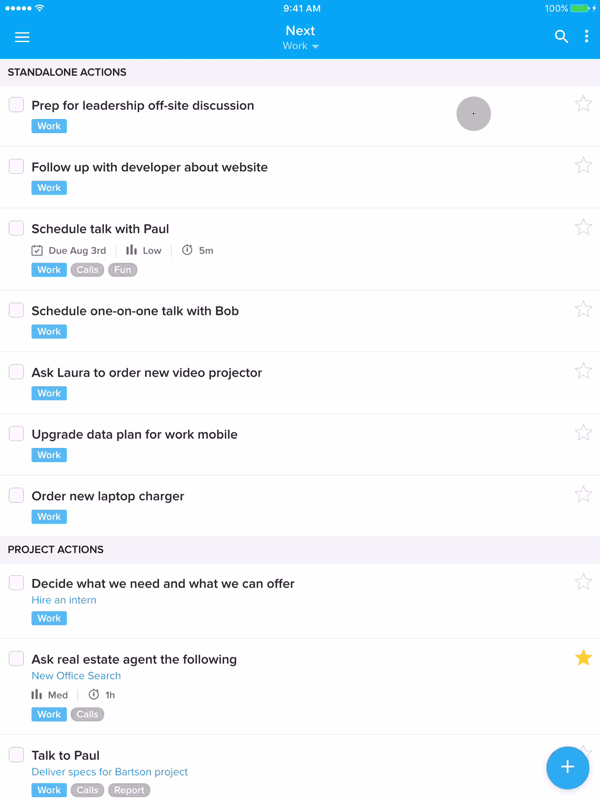
When you change an action’s state to Waiting, you’ll be asked to associate a contact with the task. This is the person who needs to do something. By looking in the Waiting list, you can see which tasks are pending and with whom you should follow up.
If your items are not really actions, you’ll want to put them in a reference list. To create one, you can:
Give the reference list a name and add any relevant tags.
As with project actions, reference items inherit the tags of the reference list itself. You can also add tags to reference items individually. However, if you want to delete an inherited tag from the item, you’ll need to remove it from the reference list itself.
Nirvana allows you to convert an item into an action, project, reference list, or reference item. Here’s how:
Good to know: Converting an item with action-related attributes, such as a task or a project, to a non-actionable item, like a reference list or item, will remove the action-related attributes.
Using the web app, you can batch-edit several items at once. Here’s how:
Lasso multiple items, right-click, and you’ll see the total amount of time to complete the selected items.
Ask yourself 2 questions:
What’s the difference?
Adding a due date works similarly to adding other tags and attributes. Take a look at how to add tags and attributes, including the due date.
You can set a deferred start date for your actions or projects by scheduling your items. When the start date arrives, they’ll move to the Next list and get a Focus star.
Since scheduling is meant for items you intend to do in the future, you can’t technically schedule an item for today. However, you can achieve the same effect by starring the action.
If you’d like to have a date attached to your action, you can give it a due date of today. This will give the item the Focus star as above, but will also add the label Due Today (which will change if it becomes past due).


GTD® and Getting Things Done® are registered trademarks of the David Allen Company. Nirvana is not affiliated with or endorsed by the David Allen Company. © 2025 Nirvana HQ Inc. See our Terms of Use and Privacy Policy. Made by PeopleLikeUs.
Terms of Use | Privacy Policy