The ability to create recurring tasks is one of the perks of being a Nirvana Pro user. You can easily schedule repeating actions so you’ll never forget to accomplish them. Check out the videos and take a look at the play-by-plays below for more details.
You can choose either to stop here or to create a due date for each copy.
Now you’re a recurring tasks expert!
To create a project, you can:
Give the project a name and choose parallel or sequential project behaviour. You can also add tags, a due date, or choose an action list for your project to live in.
As with reference items, project actions inherit the tags of the project itself.
You can add tags to project actions individually. However, if you want to delete an inherited tag from the item, you’ll need to remove it from the project list itself.
The Next list contains 3 views, all of which allow you to see the next incomplete action(s) from your project. You can mark these actions complete from here or from within your projects. Here’s how to see what’s coming:
If you check off an item and go back to editing your notes, you’ll see the hyphen replaced by an x. Here’s the whole process in action:
Good to know: Checklists can be made in all types of items, including reference lists and reference items. Just make sure to leave a space after your hyphens!
Filtering allows you to narrow your lists down to the most relevant items using assigned tags and attributes. Try the steps below for on-the-fly filters (which are set until you view a new list or clear these filters). For more permanent filters, take a look at global area filtering. If you’re looking to exclude specific words or tags from your view, learn about search.
This video also gives an overview of different ways to target the actions you need to see.
Good to know: The more filters you select, the more specific your view will be. You will only see items that match all of your filters (rather than any one of them).
You can filter all items from your Inbox, Action lists, Reference lists, and Active Projects in a single view. Here’s how:
Good to know: This type of filtering uses one tag at a time. If you want to filter these results using additional tags or attributes, use the steps above for filtering items within a single list. Similarly to filtering within a list, once you change the view, the filter will be reset.
Areas are similar to other types of tags in that you can assign them to items, manage them, and filter items with them in the same way. They’re unique because they let you change your whole view with Global area filtering. When you do this, the entire app (except for the Inbox) shows items specific to that area.
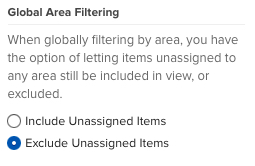
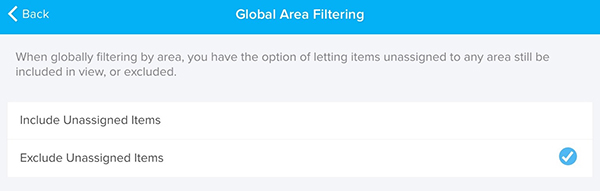
There are a few items you’ll see even if they don’t belong to the area through which you’re filtering. These are:
Unassigned items: If an item has no area tags, it’s considered unassigned. If you set your preferences to include unassigned items, you’ll see these regardless of the area selected. You can change this in your settings.
Inbox items: Even if your Inbox items have area tags, you’ll see them regardless of the global area filter selected. Since one of the goals of GTD® is getting to Inbox Zero, this helps to make sure these items are given an action state (and sent to the appropriate list). However, you can still filter your Inbox by area. To do this:
Good to know: Since Focus is a flag, not an action state, you’ll see focused Inbox items in all of your areas’ Focus lists.
If you want to find a specific item, it’s probably quicker to do a search than to rely on filters.
Once you start typing, Nirvana will display all actions, projects, reference lists, and reference items that contain matching results (and are not in the logbook or trash).
Good to know: If you don’t find an item using search, there’s a good chance it’s in a different area than what you’re using as a global filter. Try changing the view to All areas to make sure you’re searching all of your items.
You can filter your search results by due date , energy , time , or tags.
Take a look at this article for more information on filtering.
In the web app, adding a minus sign before a word or tag will remove it from the search results. For example, if you want to find all items that have the tag “Read” and the word “review”, but don’t have the word “Math”, nor the tag “School”, type “Read review -Math -School”.
If you know that what you need is in a certain list, or that a regular search will yield too many results, you can restrict your search.
Using the web app, start the search with “in:” + the selected list, followed by your search term. For example, “in:reference meditate” will find all the items in your references list that contain the word “meditate” and “in:projects meditate” will find all the items in your projects that contain the word “meditate”.Search the logbook in the web app
We’ve removed Logbook items from the regular search results to help speed things up, but you can still search them if needed.
Using the web app, start the search with “in:logbook” followed by your search term. For example, you might type: “in:logbook report” to see matching logbook results.
Good to know: The logbook shows the last 90 days of completed and collected tasks on desktop for Pro users, the last 30 days for free users, and the last 14 days on mobile. If you’d like to see more of your history, you can learn how to export your data.
Focusing items can help you highlight things that need your attention now. They get a star and they appear in the Focus list, which you can have emailed to you daily.
You can manually focus any item by clicking the star icon next to it. If you’re using the web app, you can also drag items to your Focus list or use Rapid Entry to create a focused item.
You can automatically focus an action or project by scheduling a start date or due date for the item. When the date arrives, it will appear in your Focus list.

Good to know: Starring an item doesn’t move it. The Focus list shows your starred items in one place, but the items still exist in their original locations.
If you’re worried you’ll forget to check your Focus list, you can have it sent to you each day. To start:
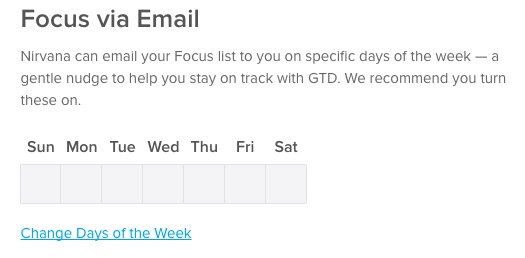
Good to know: We’ll send your Focus list to the email address you use to login, so keep an eye out for it there.
To change how notes are seen (or if they’re seen) in a list, choose from three options:
To fit more information onto your screen, you can also:
The Projects and References list both allow you to sort their items alphabetically. To choose between ordering them manually and alphabetically:
There are 3 views available in the Next list. To choose one:
Good to know: If the Next Up action for a sequential project is a Waitingfor or Scheduled action whose start date hasn’t arrived, it will not appear in the Unified List View. In the Group by Project and Sequential Next Action views, you’ll see the action after it.
There are 3 views available in the Focus list. To select one:
To mark an action complete, click the checkbox to the left of the item name.
Just like above, you can check off project actions individually to track your progress.
Good to know: These will continue to show as Done, even when they are collected to the logbook.
You can mark an entire project complete by checking it off. Doing this will also complete all associated actions.
Good to know: If you’ve set completed items to auto-collect to the logbook, the project and its actions will be moved instantly.


GTD® and Getting Things Done® are registered trademarks of the David Allen Company. Nirvana is not affiliated with or endorsed by the David Allen Company. © 2025 Nirvana HQ Inc. See our Terms of Use and Privacy Policy. Made by PeopleLikeUs.
Terms of Use | Privacy Policy